| Disc Brake Installation, Jay Harrell, January 2002 When I bought this boat, the trailer did not have any brakes installed. It seemed that the original owner intended to use the trailer for launching and storage and that didn't require brakes. At about 3000 lbs loaded, it's a bit over the limit of what my 4Runner can tow without brakes. I actually towed it to my house about 30 miles each way last year to do some maintenance and while it really wasn't a problem I didn't feel I had enough safety margin to make a long trip. Since I've been wanting to take her down to the Gulf coast for an overnight trip, I decided it was time to add brakes. Back in October I ordered the parts from Champion Trailer and we had been waiting for a not-cold, dry day to tackle this job and finally the weather forecast provided us with two in a row. We tossed every thing we could think of into the truck and headed up to the lake. As with all projects, this one required no fewer than three trips to the store and of course we left some key items at home. What with all the driving back and forth to the lake, the trips to the store, the limited daylight in January and the fact that we had never done this before, it took us two days to finish. But we weren't trying to go fast - that takes all the fun away. |
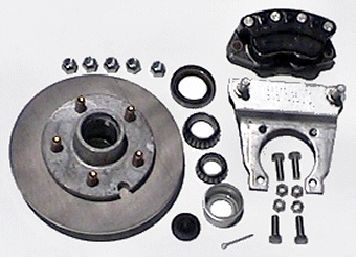 |
Brake Kit This is the part of the Tie-Down Engineering Disc brake kit purchased from Champion Trailers. The kit included the hubs, calipers, bearings, seals, brackets, brake lines, coupler, and solenoid valve. I also bought a disconnect kit because I have a tongue extension. Here is my complete parts list. This includes the parts I ordered from Champion and the extra items I had to pick up locally. Champion provides a very nice set of instructions both on their web site and with the kit. Unfortunately I left mine at home the day we did the installation. No matter as things were fairly easy to figure out and I had read the Champion instructions a couple of months ago. When I got home and dug out my copy, I was amazed at how closely we had followed them. |
 |
Original 5200# axle. My original trailer axle also came from Tie Down Engineering and already had the brake backing plate included. Even though by boat only weighs in at 2200 lbs (plus trailer), the axle is rated at 5200 lbs. As a result, it required the larger 12 inch brake kit in order to match the bearing sizes, lug pattern and brake backing plate. These are larger brakes than required for my boat, but there is no real disadvantage, other than cost, for larger brakes. The cost delta was about $100 over the cost of a 10 inch kit. |
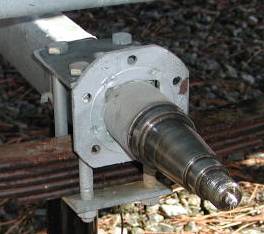
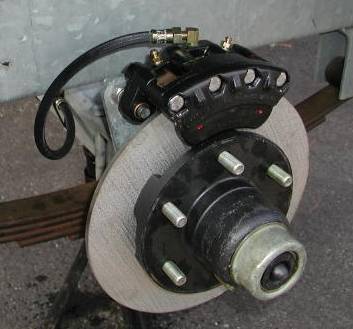
| Bracket installed. The caliper bracket fit perfectly with no modifications. All I had to was clean out the bolt holes and bolt it down. I did use the included spacer shim behind the bracket to bring it out far enough. |
 |
 |
"Spindlelube" Axles in action. The axle has a grease fitting on the end and it feeds grease in behind the inner bearing. To pack or re-pack the bearings, all you have to do is load your grease gun pump about a half a tube of grease in until clean grease comes out the front. This can be done without any disassembly and with very little mess. |
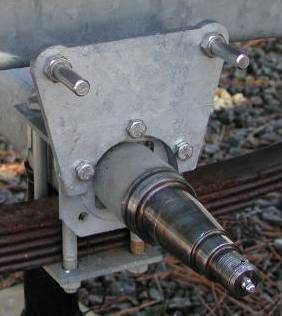
| New caliper installed. Here is the final product with caliper and brake line attached. This whole stage went very easy - everything fit on the first try. We did have to adjust the angle of the brake line fitting on the top of the caliper so that the line would clear the trailer frame, but all that was required (after much debating about which way to turn) was a 45 degree turn with a wrench. You also have to avoid any twist in the brake line and you must install the caliper end first so that you can then adjust for twist on the other end. It took us a couple of tries to get all of this right. |
 |
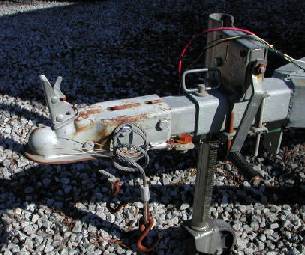 |
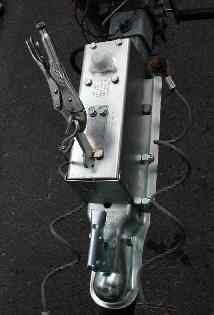
Coupler Now that the wheels were complete, it was time to install the coupler and then the brake lines. This turned out to be not nearly as easy as the disc and caliper installation as it required adapting the generic kit to my particular trailer. Original Coupler. Here is my original Coupler. We had clearance problems with the pin for the tongue extender and with the fitting for the safety cables. Notice the built-in conenction point for the brake line and disconnect just behind the jack and under the tongue. Brakes were an option on this trailer when it was new and even the non-brake version came with the various brackets already in place. |
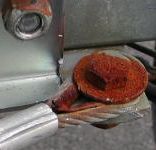
| Grinding We had to grind the back edge of the coupler so that it would clear the safety cable mount. It didn't take much, but we couldn't bolt the coupler to the tongue without it. We also had to enlarge the bolt holes in the tongue as the holes did not line up exactly straight. Finally it did all fit together smoothly. |
 |
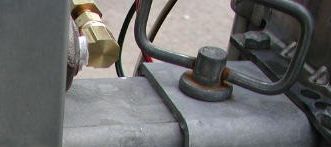
| Right Angle Adapter The kit was designed for the brake line to come straight out the back of the master cylinder, but the tongue extender pin made that impossible for us. We picked up a right angle fitting at a hardware store for less than $1. |
 |
 |
Quick Disconnect My trailer has a telescoping tongue extender and that presents something of a problem for steel brakes lines. I found two solutions. I've seen a few trailers with flexible brake line and I've seen a few trailers with a quick disconnect fitting. The tech support guys at Champion recommended the quick disconnect approach and since that is also what would have been on my trailer had it had factory brakes, that is the approach I took. Unfortunately, the quick disconnect didn't match my fittings exactly and we had to improvise a little. The picture shows the result. I can't really say how well this works yet - time will tell. |
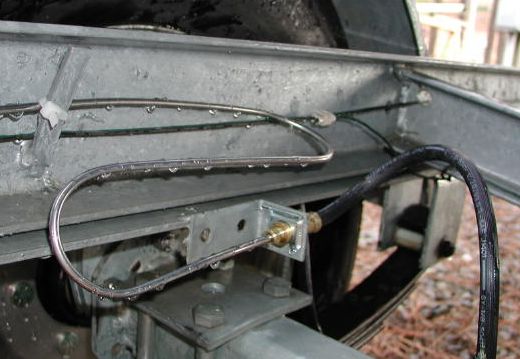
| Right wheel brake line. Finally it was time to install the brake lines on the trailer itself. One nice thing about being at a sailing club for this project is that I had a lot full of other sailboat trailers I could inspect for ideas. I was able to tell just how sharp a bend the steel lines could take and the the most common way to attach a brake line to an axle. |
 |
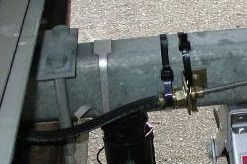 |
Left wheel brake line. The kit includes a bracket to hold the flexible brake line in place, but I think it would have worked better without it. The zip ties also came with the kit and seem to work great for holding everything in place. Besides, that's how nearly all of the other boats in the lot were done. |
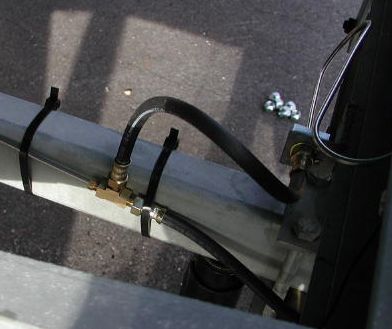
| Main brake line. I ordered a 16 foot main line and it was just a very little bit too long, so we had to put in a little zig-zag. The terminating bracket was already on the trailer, as were brackets along the length of the frame that we used to hold the brake line in place. Once the steel line is attached on both ends, it doesn't tend to move anyway so it's easy to get a secure installation. |
 |
 |
Ready to Bleed. Here we are with everything installed except the brake fluid. The hardest part about this job is that the wind was blowing 10-15 mph the whole time and it's so hard to miss a good sailing day in January. But once the wheels were off the trailer we didn't have much choice but to press on ahead. |
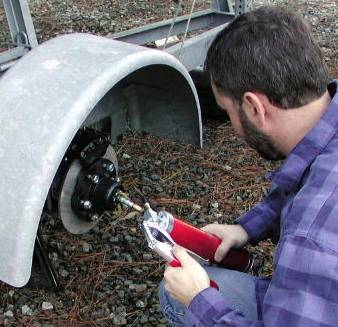
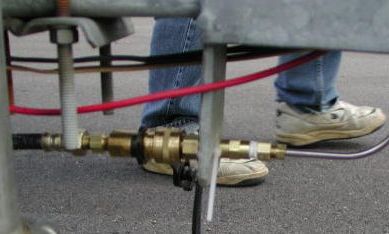
| Pump away. You pump the emergency break away lever to bleed the system and a pair of Vice Grips made that bearable on the hands. You have to start by purging the master cylinder with the lines disconnected. Once you get the master full of fluid you reconnect the lines and then go to each fitting one at a time. Once we got the air out and started putting pressure on the system, we discovered that we had not tightened the various fitting nearly tight enough. We had to put a tremendous amount of torque on rather small brass nuts to get the flair fittings to stop leaking, but we didn't strip any of them so I guess we didn't go too far. |
 |
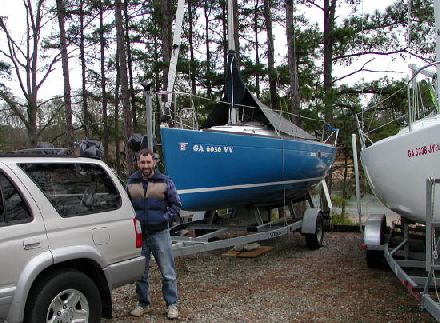 |
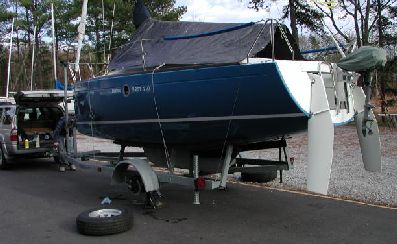
Finished at last! Here she is back on her wheels and in her parking space. I didn't want to take the mast down for a real test drive, so I drove her up and down some steep hills on the club grounds. The brakes make a huge difference. I can't wait to get her on the highway again. |
Home
[an error occurred while processing this directive]